NOTE: Please Use this guide with proper caution. Running this script can cause a spike on your server’s load if not monitored properly.
UPDATE: In JetBackup 5, task processing is now service based which allows for simultaneous processing for up to 10 tasks at a time! For more information on the latest major JetBackup release, please visit: https://www.jetbackup.com/jetbackup-5/
In JetBackup 4, you can set the number of concurrent queued tasks (restores, downloads, etc.), which allows JetBackup to run a set number of processes at a given time. One major caveat is that these processes are cron-based, which adds a 1-minute delay in executing each task in the queue.
Let’s say you have three(3) restores and three(3) downloads on your queue, and you set a total of 6 concurrent queued tasks on your Performance Setting. JetBackup will execute the first queued task then wait another minute before executing the next task. With six(6) total tasks from our example, It would take JetBackup an additional six(6) minutes to execute all six(6).
Now you may think, ok, not a big deal. You don’t necessarily want multiple tasks running at the same time, especially for heavy workloads. And adding a minute to the processing time doesn’t seem too long add on the total execution time when restores and downloads may take more than a few minutes, maybe even hours.
But let’s imagine your server is hosting hundreds, even thousands of accounts, then your server goes down, requiring you to restore all accounts on a new server. Some of the accounts will take more than a few minutes to restore, while others are light enough that it takes less than a minute. Even if you set the concurrent queued tasks higher, JetBackup will add hundreds or even thousands of minutes to the entire download process due to the 1-minute delay for executing each queued task.
So how do we work around this issue? By creating a script and using the JetBackup Command Line tools to trigger a set number of tasks at a given time!
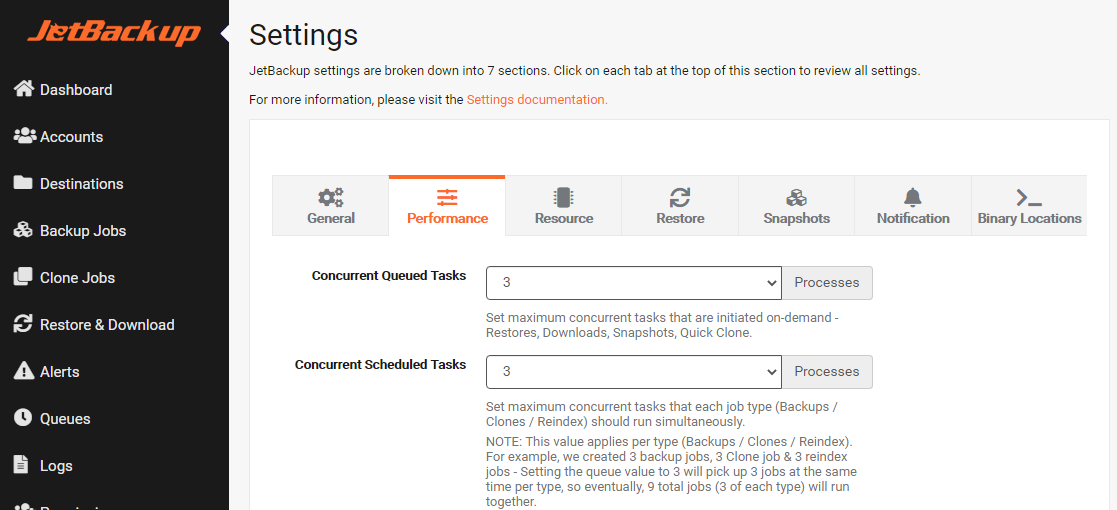
Step 1: Change JetBackup performance settings
For faster restores, you can consider tweaking JetBackup performance settings. The number set under “Concurrent Queued Tasks” will be the actual number of simultaneous concurrent restores used by our restore script. Keep in mind it will come at the expense of CPU / IO usage.
From JetBackup administration menu, navigate to Settings -> Performance settings. Here are settings needed to be changed –
- Concurrent Queued Tasks (change to the desired number)
- Restore Server Load Limits – Disable
- Restore sleep time – Disable
- Edit destination – Disable rsync limits (if applicable)
- Disable safety backups (Prevent jetbackup from trying a safety backup before restore)
Step 2: Disable JetBackup’s crons
We are not sure how much time the restore will take, so it is best to temporarily disable all crons. Edit the “/etc/cron.d/jetbackup” file and simply add “#” at a beginning of each line –
vi /etc/cron.d/jetbackup

SHELL=/bin/bash
#* * * * * root /usr/bin/jetcli backup --run backup > /dev/null 2>&1
#* * * * * root /usr/bin/jetcli backup --run reindex > /dev/null 2>&1
#* * * * * root /usr/bin/jetcli backup --run restore > /dev/null 2>&1
#* * * * * root /usr/bin/jetcli backup --run downloads > /dev/null 2>&1
#* * * * * root /usr/bin/jetcli backup --run snapshots > /dev/null 2>&1
#* * * * * root /usr/bin/jetcli backup --run clone > /dev/null 2>&1
#0 1 * * * root /usr/bin/jetcli backup --daily > /dev/null 2>&1
Step 3: Create a bash script and give executable permission
touch /root/multiple_restore.sh
chmod +x /root/multiple_restore.sh
Step 4: Copy the following code and paste in the bash script
#!/bin/bash
PROCESS_COUNT=$(ps aux | grep jetcli | grep restore |wc -l)
PROCESS_LIMIT=10

#while 0; do # // sometimes using "true" returns error, use this instead
while true; do

     if [[ $PROCESS_COUNT -lt $PROCESS_LIMIT ]]; then

           /usr/bin/jetcli backup --run restore &

     fi

sleep 1
done
NOTE: The following script will trigger a restore every second until it reaches the specified number of processes to trigger at a time. You can change the number of processes to execute at the 3rd line under (PROCESS_LIMIT), which is set to 10 on the sample script.
Step 5: Now let’s try and test our script
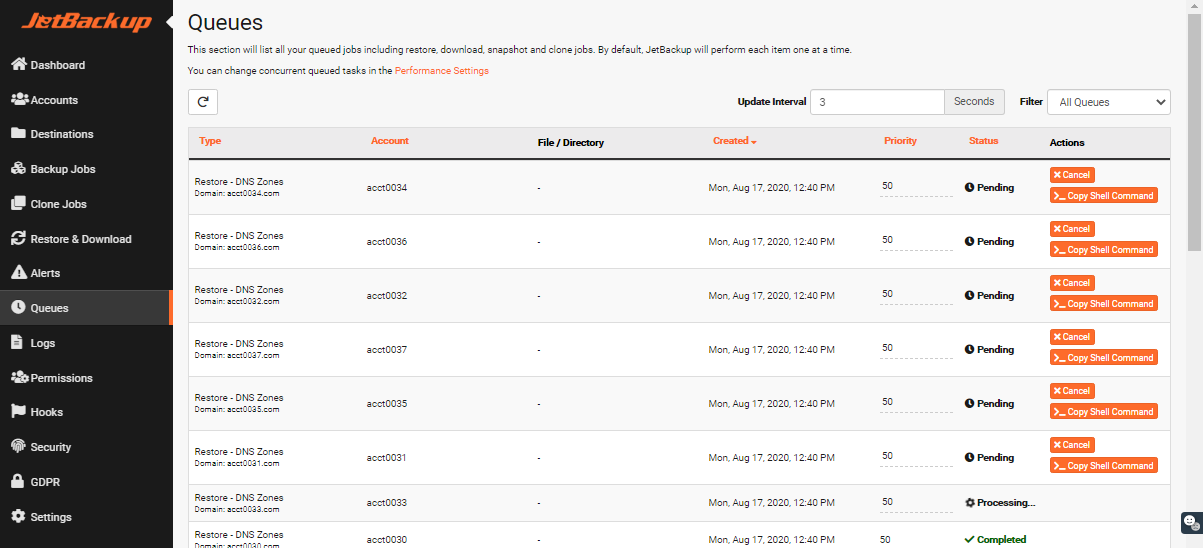
For this example, I queued 60 accounts to restore their DNS Zones, each a few KBs in size. You would imagine that it should only take a few minutes to complete the entire queue. But due to the delay in executing cron-based processes, JetBackup will take an extra 60 minutes to complete an extremely light workload!
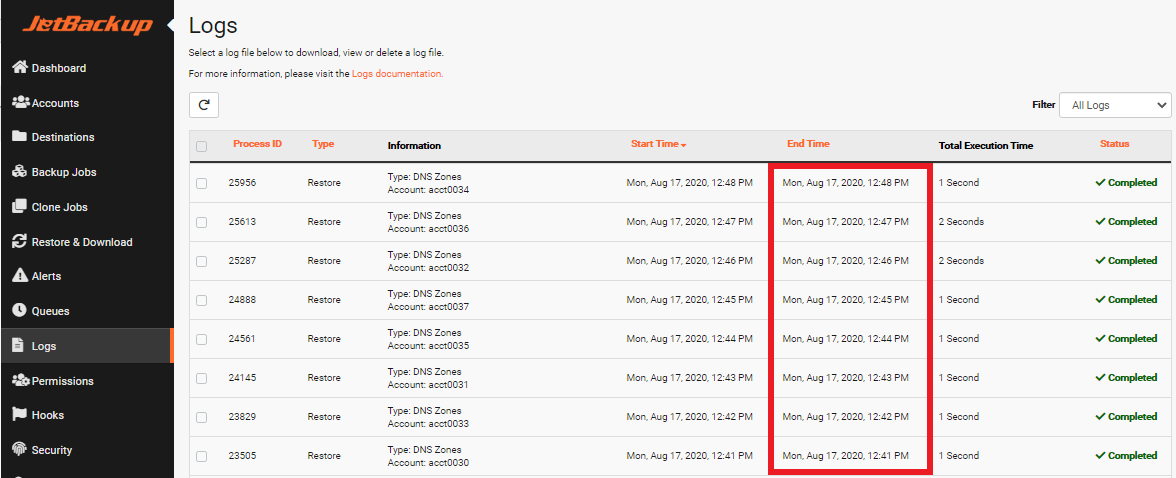
In the example above, each restore starts every minute and only takes a second or two to complete! Now let’s go ahead and execute our script in the terminal:
sh /root/multiple_restore.sh &
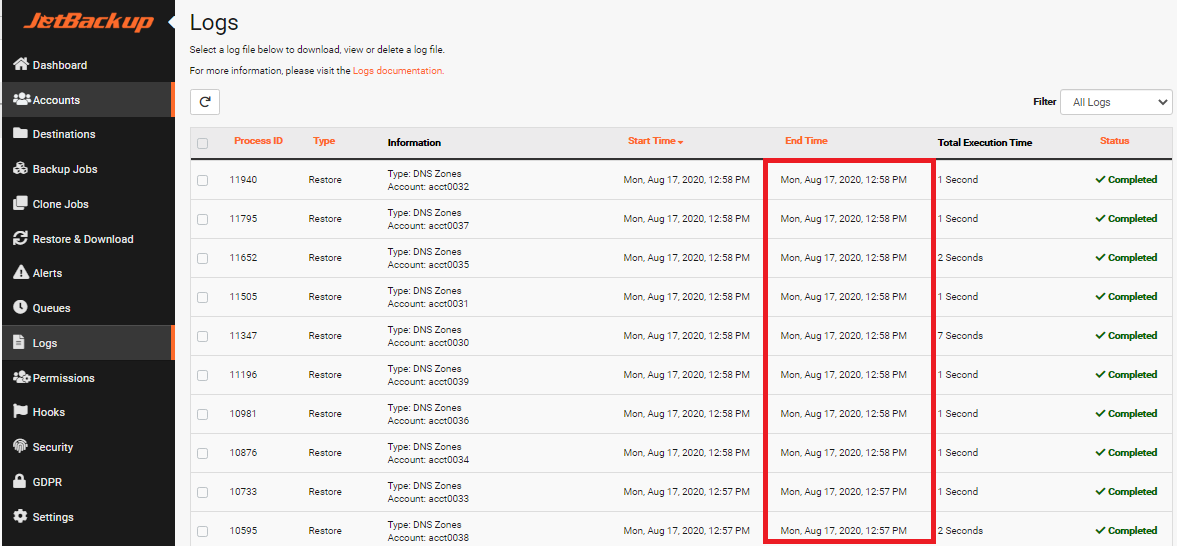
With the script running, JetBackup is now processing multiple restore at the same time! Once your restores are complete, make sure to terminate our script!
Similarly, you could trigger multiple download tasks by copying the following code in a bash script:
#!/bin/bash
PROCESS_COUNT=$(ps aux | grep jetcli | grep downloads|wc -l)
PROCESS_LIMIT=10
while true; do
if [[ $PROCESS_COUNT -lt $PROCESS_LIMIT ]]; then
/usr/bin/jetcli backup --run downloads> /dev/null
fi
sleep 1
done

Don’t forget to re-enable JetBackup’s internal restore cron once you are done!
Tags: JetBackup

Leave a Reply