Managing your XEN VMs using Reduxio storage gives you the power of Backdating –
BackDating operates like a built-in time machine, instantly recover your applications from any data loss event – be it software failure or cyber attacks, simply by cloning/reverting volumes from the past.
Restoring a SR from the past will take a second, however extracting the desired VM from the SR could be a nasty assignment when it comes to XEN and how they handle iSCSI.
To make this achievable, VMs metadata must be stored on the SR we would like to restore from. To make it happen, we should use use the meta-data export tool.
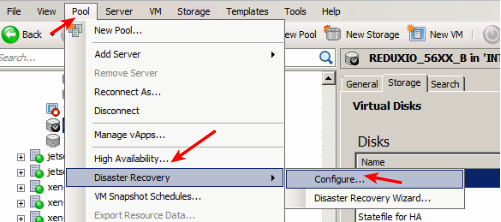
1. On the primary site, select the pool that you want to protect. From the Poolmenu, point to Disaster Recovery, and then click Configure.
2. Select up to 8 SRs where the pool metadata will be stored. A small amount of space will be required on this storage for a new LUN which will contain the pool recovery information.
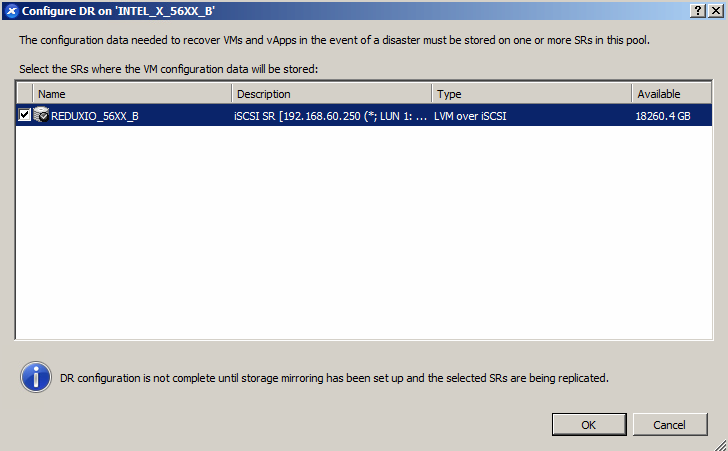
NOTE: Disaster Recovery can only be enabled when using LVM over HBA or LVM over iSCSI. A small amount of space will be required on this storage for a new LUN which will contain the pool recovery information.
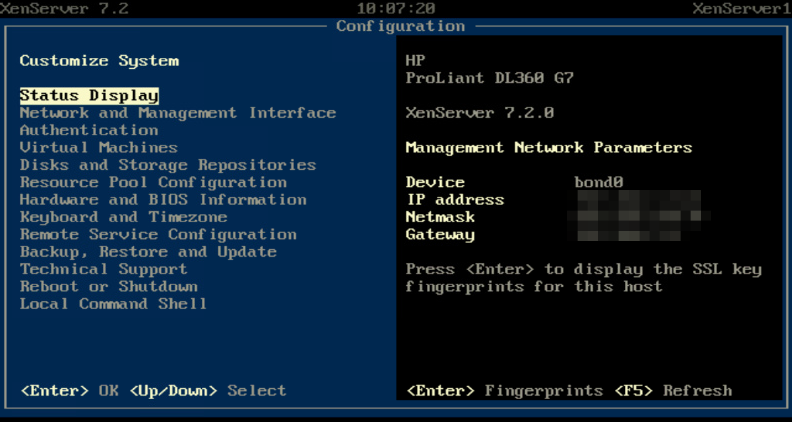
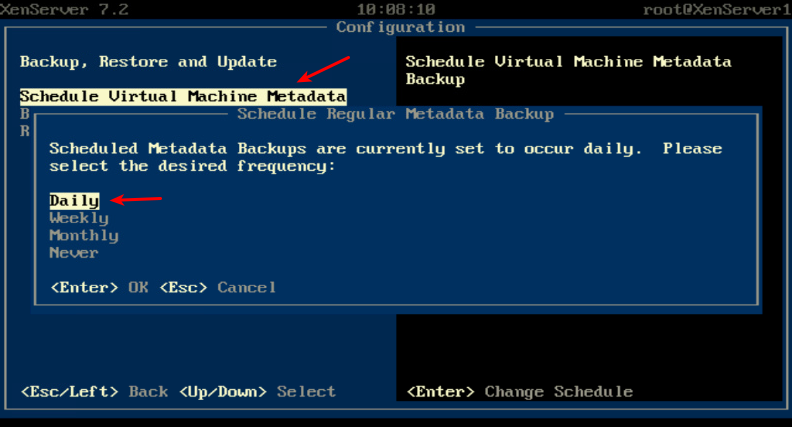
To be on the safe side, we also enabled scheduling for this task. As far as we know, this can only be configured through the console –
Now that the meta-data is stored on the SR itself, we can clone our volume using Reduxio backdating feature and a restore a VM from it.
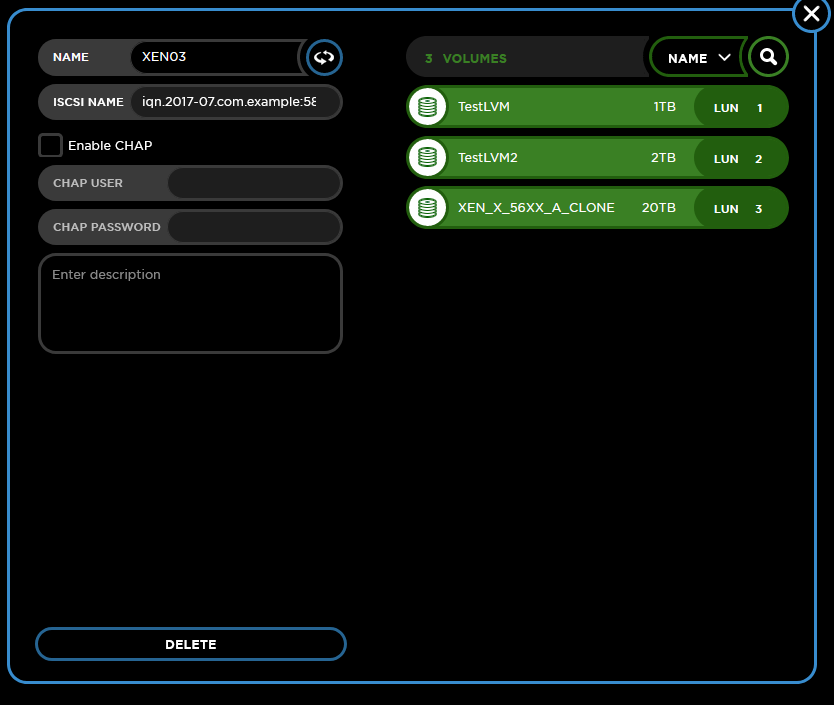
Let’s start by creating a clone of our SR – Login to your Reduxio admin panel, choose the volume you want to clone and clone it to the past. To prevent mistakes, we added a “_CLONE” to the new volume name –

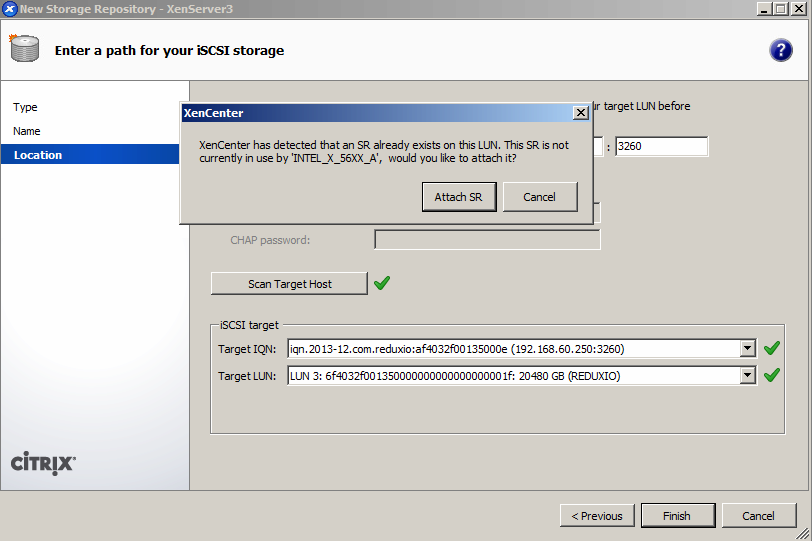
Now that we have a cloned volume, we can connect it to a XEN host, so we can extract our VM from. It is not possible to connect the SR to the same XEN host we took it from due to iSCSI limitation (and it’s not that safe). So, we used a another independent XEN host to connect the new SR volume to –

 Now to the interesting part – the SR is successfully connected to the XEN host, however – how do I see the VMS ? We need to import the metadata into that host !
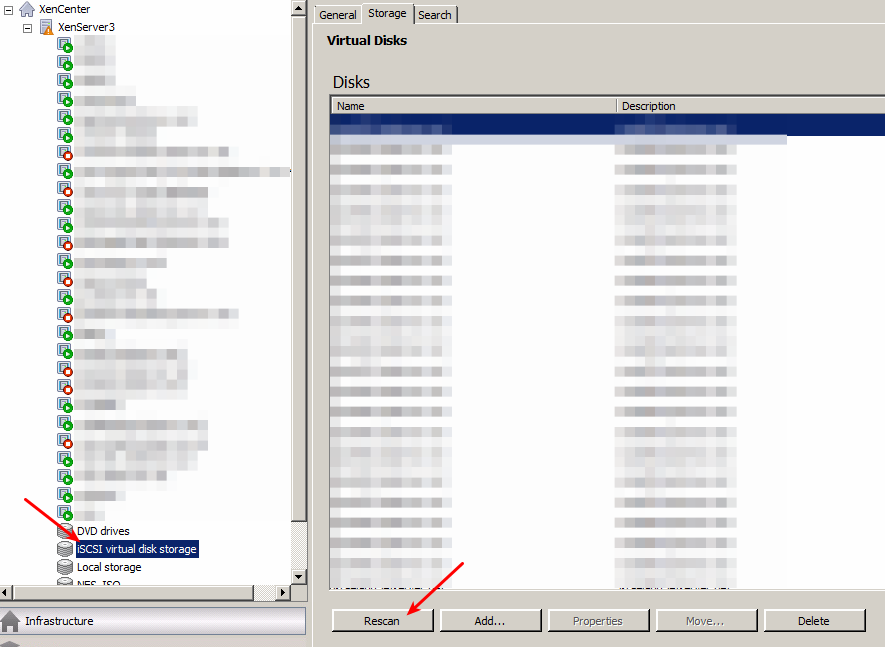
First, we need to initiate SR scan –
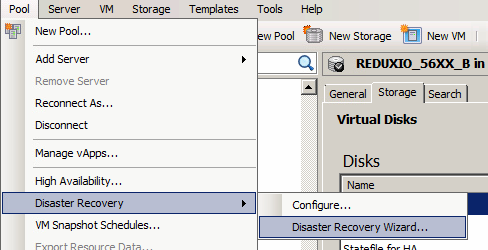
After the scan is finished navigate to Pool menu, point to Disaster Recovery, and then click “Disaster recovery wizard”
In the following menu you will be asked choose between a Failover / Failback / Test failover. Since we are restoring to a different host, we will use the “failover”. Choose the SR you’ve just connected, select virtual machines to restore – and you are done !
NOTE: The “Test failover” feature will work exactly as the failover only that it will delete the vm at the end of the procedure.
Leave a Reply